The one thing you can be sure you’ll need to do with virtually every DIY project is keep it still and stable while you work on it.
‘Owning a good collection of clamps and a solid vice is like having a crew of reliable helpers on standby to hold something for you,’ says Australian Handyman contributor Gun Arvidssen.
And you will be rewarded with years of reliable service if you buy the best quality you can afford.
‘My dad is still using the same G-clamps he’s had since I was three years old, and they work as smoothly now as they ever did,’ says Gun.
A gripping tale
Although most people are familiar with what a vice does, there is confusion about the difference between clamps and cramps.
It’s not a spelling error, there is a genuine technical distinction between these two different classes of device.
CLAMPS use spring pressure or friction to hold things together. Often designed to be operated one-handed, they offer less power than cramps but are easier to use.
CRAMPS rely on a screw-type mechanism, in the same way as a vice, and are capable of exerting a great deal of force. Sash, pipe, corner, G and F shaped tools fall into this category.
VICES are typically mounted on a workbench. Metalwork vices are usually bolted to the top, and woodworking vices installed into the side of the workbench.
Cramps
In practice, the word ‘cramp’ has mostly fallen out of favour and the majority of DIYers are familiar with the terms that describe the different types of tools, such as F-clamps or bar clamps.
This means a more detailed explanation about the mechanism each clamp uses to exert force is not really necessary.
To avoid overcomplicating things, we will stick to using the same word for both categories.
G-clamp
About as simple as a clamp can get, this comprises a roughly semicircular steel frame with a heavy-gauge threaded spindle that is wound through one end, making it looks like the letter G when open.
The spindle has a disc-shaped swivel shoe mounted at one end, which moves towards or away from the top arm of the G as it is turned with a tommy bar at the other end.
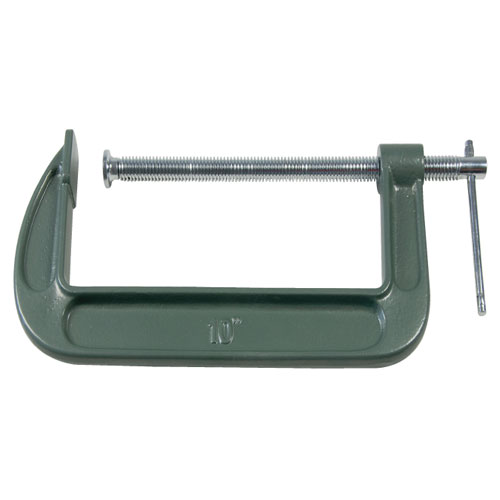
A G-clamp is about as simple as a clamp can get
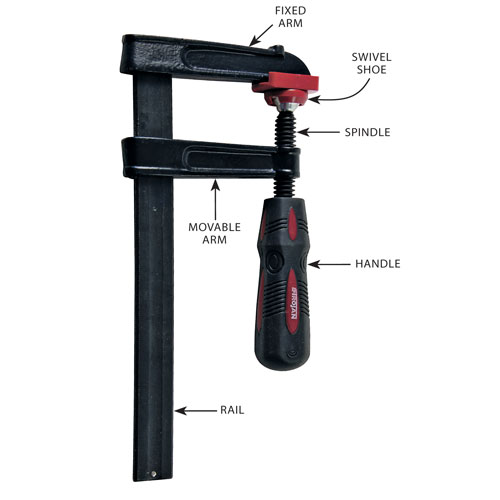
F-clamp
Less solid than a G-clamp but with more reach, an F-clamp has a similar arrangement to a spindle with a swivel shoe doing the clamping against an opposing frame.
The difference is that the arms are straight instead of rounded, and mounted on a rail which makes them resemble the letter F.
One arm is permanently attached at the end of the rail while the other can slide towards or away from it to suit the size of the workpiece.
When pressure is applied, the movable arm locks against the rail.
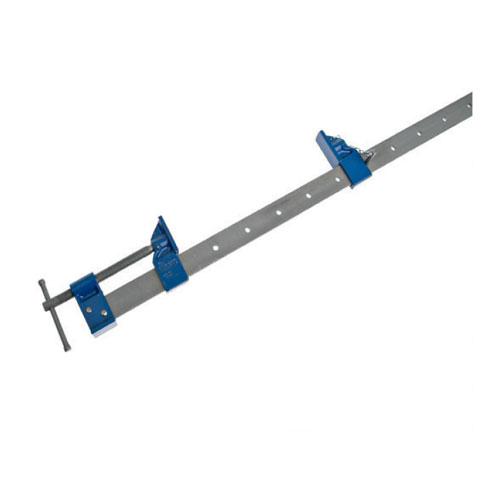
Long-range clamps
If you need maximum clamping force for a bigger project than even the longest F-clamp can comfortably handle, such as when edge-laminating timber to make a tabletop, sash clamps and pipe clamps will hold it steady and save the day.
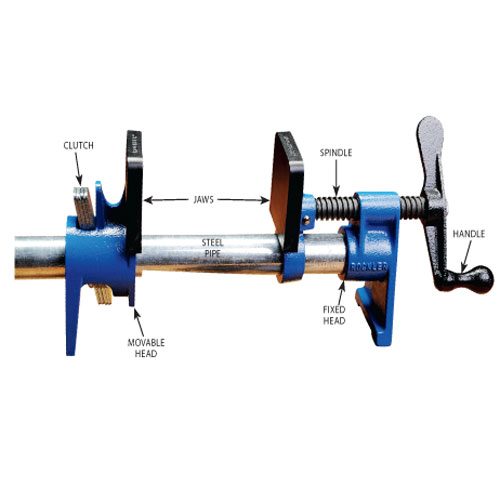
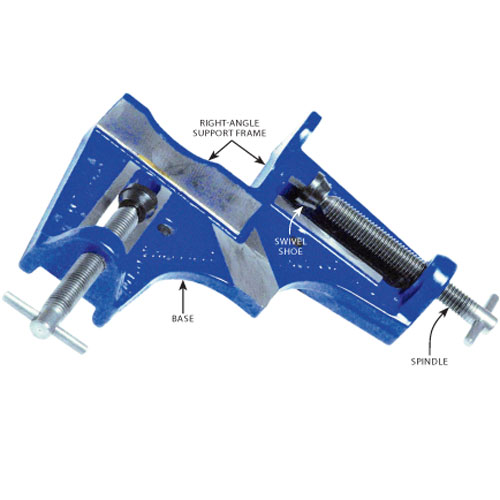
Pipe clamp
These are usually supplied as a set of clamp heads compatible with standard 19mm steel pipe.
The fixed head winds onto the threaded end of the pipe with a handle to turn the spindle and push a jaw that moves along the pipe.
The movable head is a jaw mounted on a collar that can slide freely along the pipe, with a clutch mechanism to lock it against the pipe.
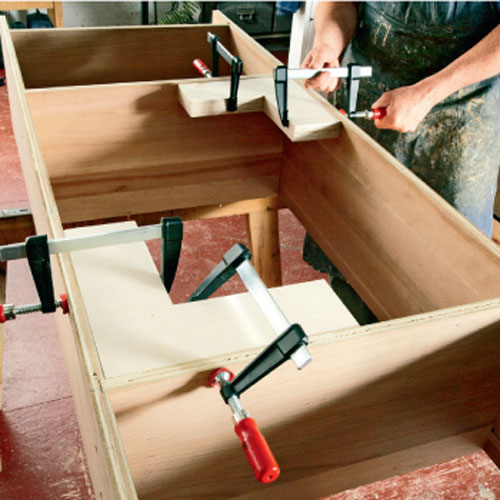
Edge-laminating timber
Step 1. Match the grain pattern
Step 2. Set up the clamps
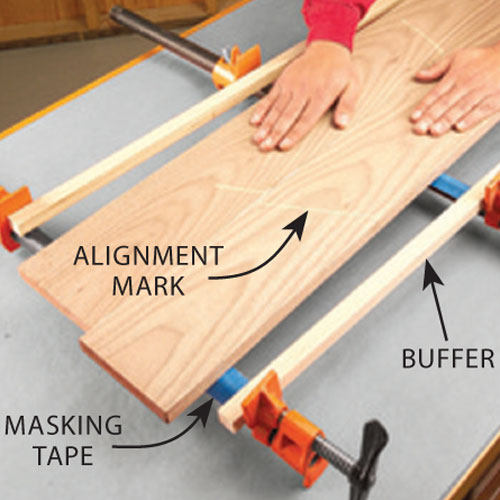
Step 3. Laminate the boards
Mark up dowel holes or biscuit slots then apply PVA adhesive and insert the fasteners. Gradually tighten the clamps until adhesive oozes out then use a steel rule to check for any bowing, tapping in shims if needed.
One-handed clamps
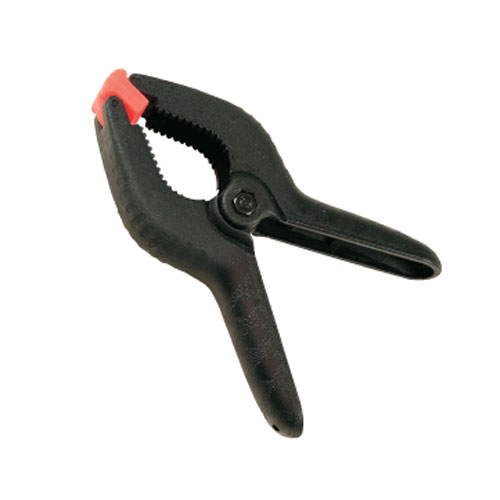
Spring clamps
They are best for thin workpieces such as plywood or MDF and use spring tension to exert force.
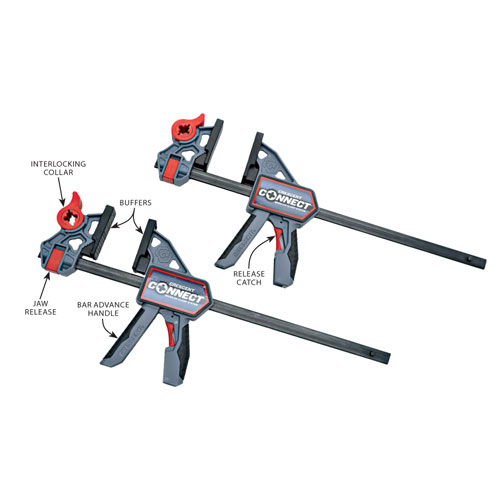
Bar clamps
They are operated by squeezing the handle to advance the bar with a fixed jaw at the end. A smaller trigger catch can be pressed to release the bar and let it slide freely.
TIP Some models even feature an interlocking function that allows them to be used as a temporary vice.
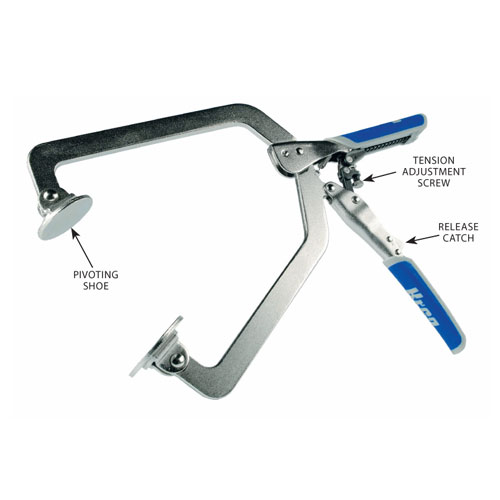
Locking clamps
The tension and opening width is normally adjusted by turning a knurled screw, then the mechanical strength of the steel frame holds the workpieces with considerable force once the handles are squeezed together into the locked position.
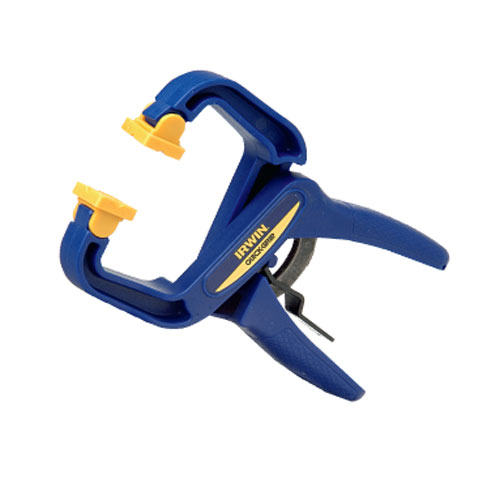
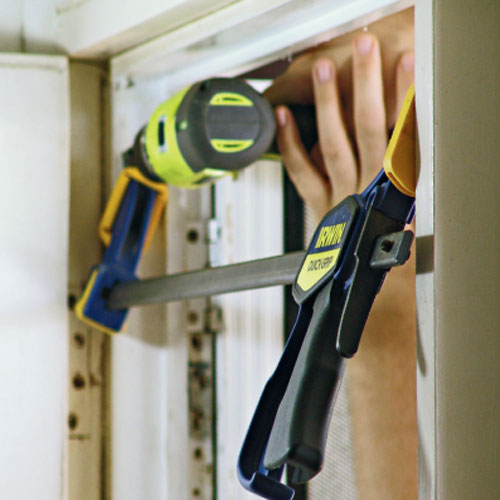
Handy clamps
Pressing the trigger releases the pressure. This type of tool usually has a wide pincer action and a small footprint, making it useful for holding items with an irregular edge that may obstruct other types of clamps.
Clever clamping
Use clamps as spreaders
Reverse clamps, also called spreaders, are perfect for holding things in position when the outside of a workpiece is irregularly shaped or inaccessible. They can also be used for gently jacking apart timber frames to crack dowel joints when restoring old furniture.
Protect the workpiece
Buffers spread the clamp’s force over a wider area, which helps with the even distribution of adhesive.
TIP Make a set of buffers by drilling holes in scraps of 9mm plywood and gluing in small neodymium magnets, available from specialist suppliers.
Clamp corners
Use F-clamps to hold the braces firmly in opposite corners of a bookcase, cabinet, frame or similar assembly for perfectly square joints.
Helping hands
A few clamps and timber offcuts can save the day. The key is to picture how the other person would hold things for you then emulate that support using mechanical helpers.
Extend pipe clamps
Remove the movable head, wind a threaded coupling onto the end of the pipe and attach a second length of pipe, then replace the head.
TIP This won’t work if you’ve cut the pipe to size, unless the fixed head can be clutched onto unthreaded pipe.
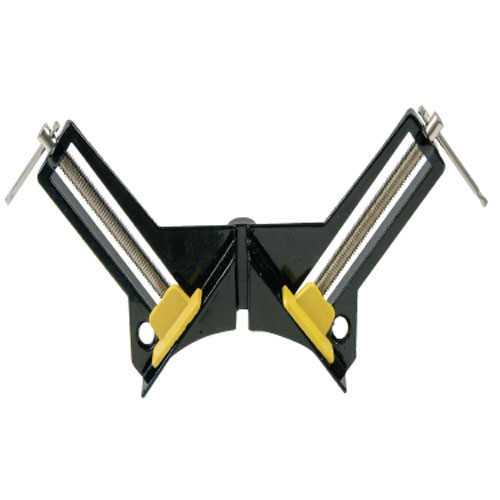
Framing clamps
Corner clamp
They typically have swivel shoes with a reasonably large surface area to avoid damaging intricately shaped moulding, as well as a generous span to accommodate wide pieces of timber.
Four-way speed clamp
A clever design feature is that the collars are often cross-drilled, allowing them to slide along the rods at a slight diagonal, and the thread only engages with the rod when they apply pressure against the L-blocks.
Heavy-duty framing clamp
TIP Some types even feature a swivel head that allows them to clamp workpieces of different thicknesses.
Band clamp
The band is then locked off and a spindle mechanism is used to apply tension to the band, compressing the mitred joints tightly together.
Vices
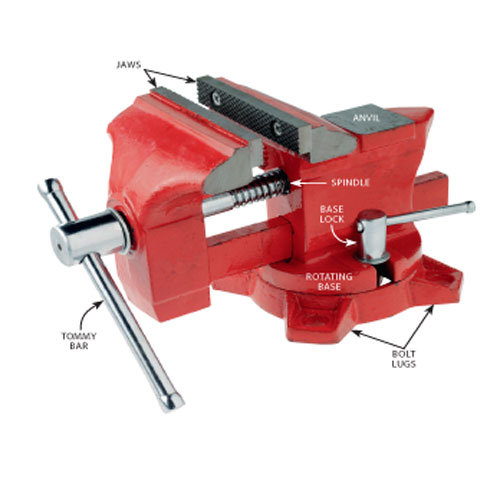
Engineer’s vice
It has a solid construction and narrow, knurled jaws designed for gripping metal workpieces. Many are mounted on a rotating base that allows them to swivel through 360º so they can grip the workpiece at the optimal angle.
An anvil is often machined into the back of the vice, or the sleeve over the spindle may be flat for the same purpose.
Woodworking bench vice
Woodworking vices are recessed into a workbench so the fixed jaw finishes flush with the side, allowing long pieces of timber to be supported along the full length of the bench.
If your benchtop has a skirt or a framework along the edge, simply install the vice behind it.
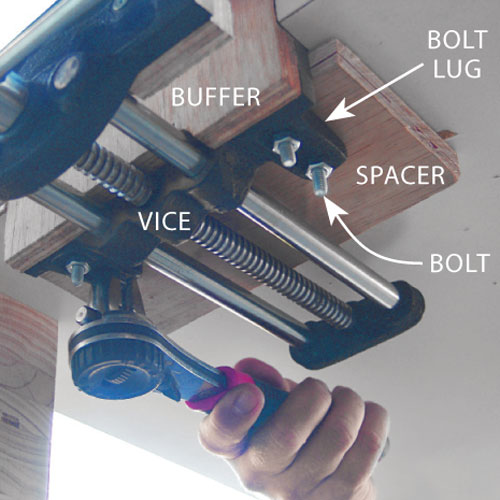
Install a bench vice
Step 1. Cut the spacers
Step 2. Make the recess
Step 3. Bolt on the vice