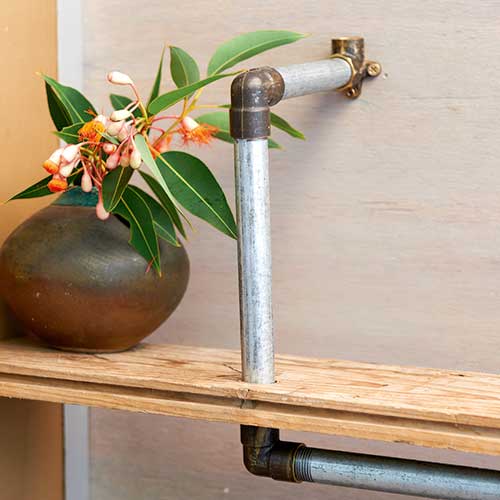
It gives the impression that the shelf has been installed around the plumbing.

When mounting the shelf to a plasterboard wall, find the studs and mark them on the wall using masking tape, then use the distance between the studs to determine the length of the lower pipe.

DIY TIP: Mount the shelf to the studs or use hollow wall anchors through plasterboard.

Step 1. Drill the holes

Step 1. Drill the holes
Sue Ferris

Mark two pipe holes on the shelf with the centres spaced the same distance apart as the stud centres, and 40mm from the front edge.

Drill the holes using a 15mm spade bit.

Make a third hole in line with the first hole on the right, 90mm from the front edge.

Advertisement

Step 2. Assemble pipes

Step 2. Assemble pipes
Sue Ferris

Attach a 200 and 100mm long 15mm pipe to each end of a 650mm pipe with 90° elbows and feed through the front holes from underneath.

Add an elbow to the 200mm pipe and two joined elbows to the 100mm, feed a 300mm pipe through the back hole and attach.

Step 3. Mount shelf

Step 3. Mount shelf
Sue Ferris

Join a 150mm pipe to the left vertical pipe and a 100mm to the right one with 90° elbows, then attach a lugged capillary elbow to the end of each horizontal pipe.

Mark the screw holes on the wall, securing the shelf to the studs with 10g x 75mm timber screws.

Sign up for emails