
A mitre is a joint made by bevelling two surfaces to be joined, usually at a 45º angle.
When they’re done well, mitred joints look great, hiding end grain and matching face grains perfectly.
They can also be a pain in the neck, as it requires a degree of skill to make very precise cuts with a mitresaw, followed by a lot of fussy fastening to make them secure.
If you sometimes struggle to achieve the perfect mitre joint, these tips for tighter mitres cover the common situations you’ll encounter most in the workshop.
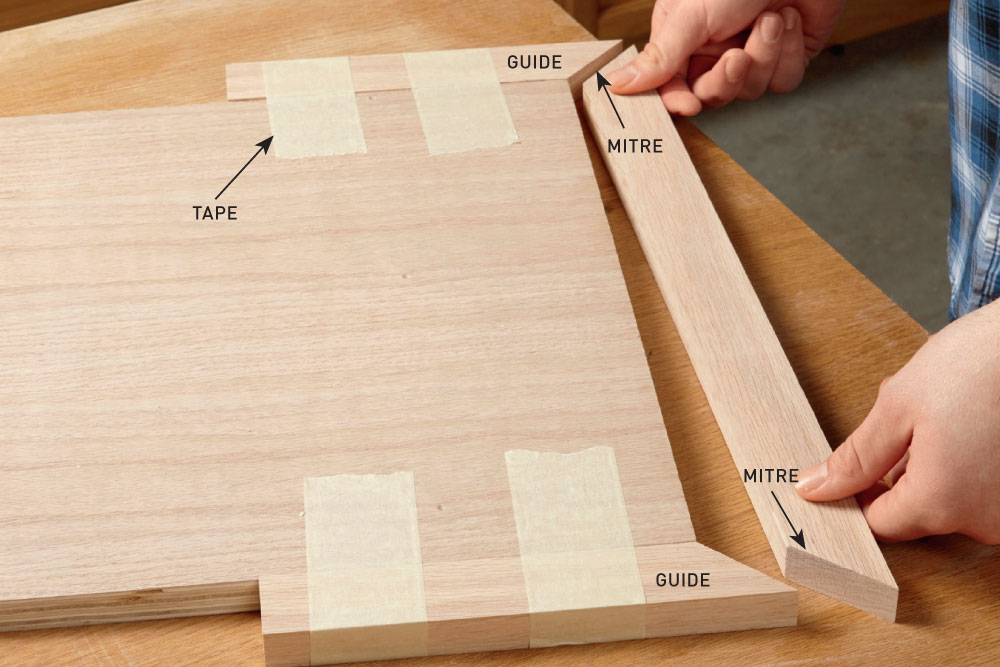
Use timber guides
It’s very difficult to get the length and position of a mitred part right if it isn’t butted up against the adjoining mitres.
For a guide, tape or clamp mitred scrap timber in position before you start cutting the parts. Make sure you remove the guides as soon as you glue the part in position.
This stops stray adhesive turning temporary guides into permanent ones.
It’s very difficult to get the length and position of a mitred part right if it isn’t butted up against the adjoining mitres
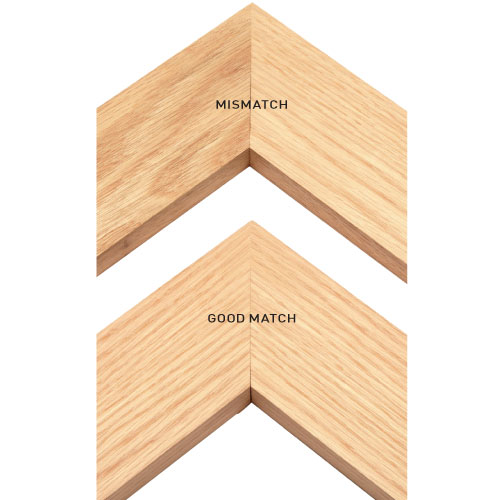
Match the grain
Whether you’re banding a tabletop or making a picture frame, it is important to ensure the timber colour and the grain pattern match at the mitres.
Selecting matching timber only takes a few moments and gives you much better looking mitres.
Selecting matching timber only takes a few moments and gives you much better looking mitres
Slow down your glue
Aligning and clamping mitres is hard enough without rushing to get it done before the adhesive starts to set. That’s why there are slow-setting adhesives.
You can increase the drying time of water-based adhesive such as interior PVA by about five minutes if you mix in one part water to 20 parts adhesive.
The water will weaken the bond, though, so if strength is critical, it’s worth buying a slow-setting adhesive.
Clamp with your hands
When you’re dealing with small or fiddly parts, your hands make the best clamps. Simply rub the two glued surfaces together and hold them tightly together on a flat surface for about a minute.
Let go and allow the joint to set for 30 minutes before handling it.
When you’re dealing with small or fiddly parts, your hands make the best clamps
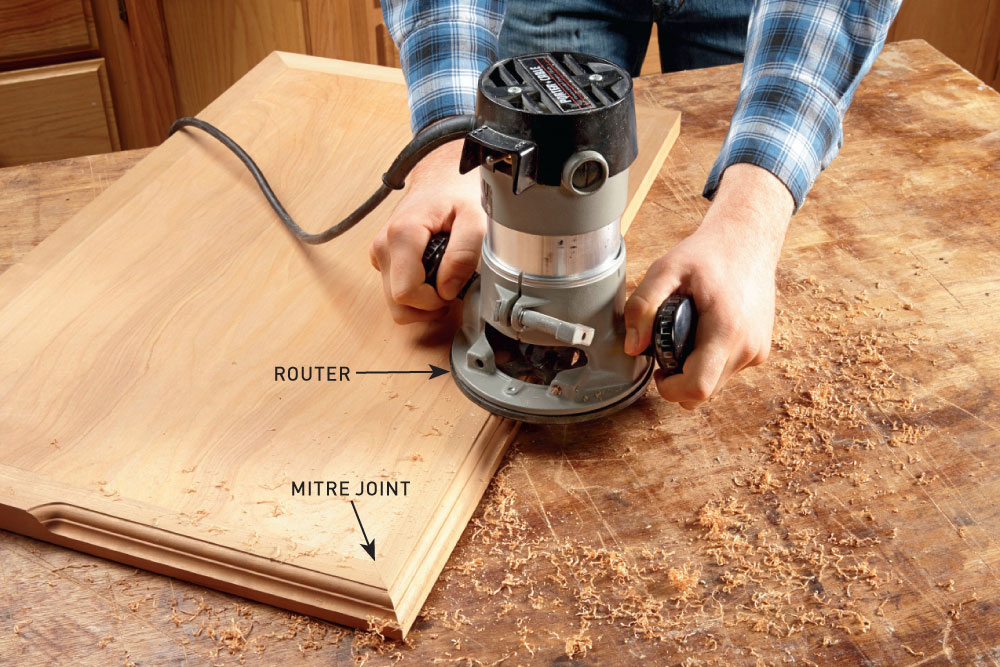
Mitre, assemble, rout
Shaped mouldings can be tough to mitre, align and clamp. You can make life easier by starting with plain square stock, then after assembly, use your router to shape the edges.
The risk with this method is you’ll gouge or splinter parts already in place.
Making a series of shallow passes instead of one full-depth cut is the best way to avoid disaster.
Shaped mouldings can be tough to mitre, align and clamp
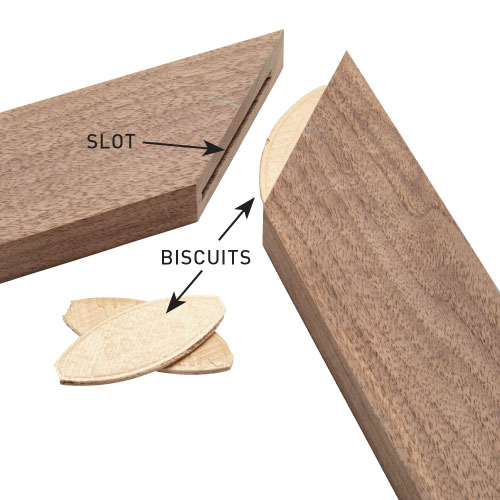
Align with biscuits
When mitres are lubricated with a coat of adhesive, it’s not easy to align and clamp them.
That is why carpenters often use biscuits on mitre joints where extra strength is not needed.
And cutting biscuit slots is a fairly minor job that gives you major help at gluing time.
When mitres are lubricated with a coat of adhesive, it’s not easy to align and clamp them
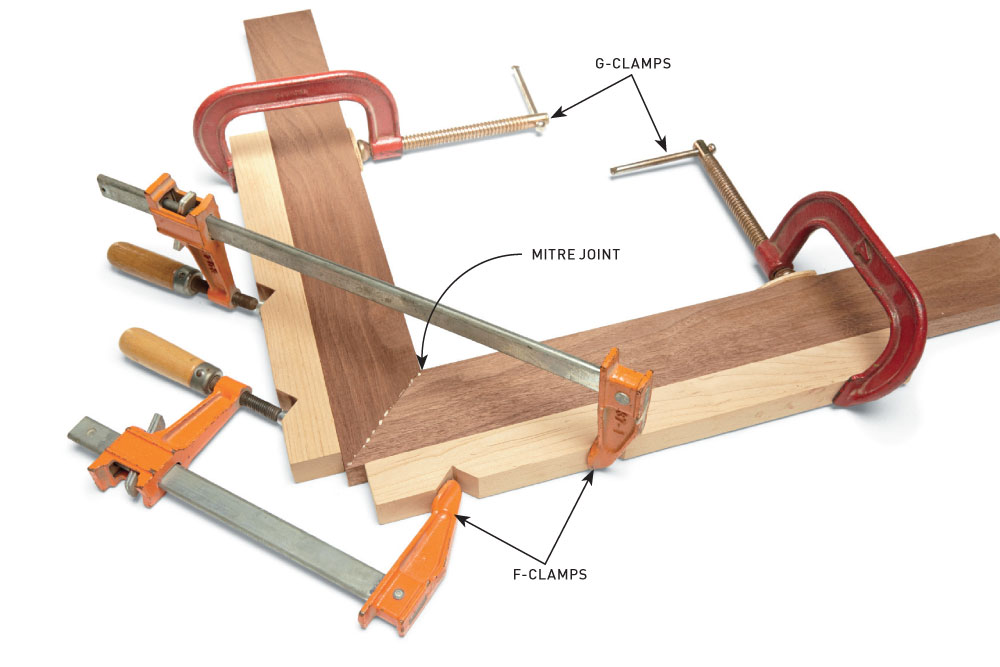
Create corner clamps
This is an old favourite among seasoned woodworkers. Clamp a couple of notched blocks to the mitres using G-clamps, then add a few simple sliding F-clamps to squeeze the joint together.
This allows you to put a lot of pressure on the joint without having to shell out extra dollars on specialised clamps.
If you’re assembling a four-sided project such as a picture frame, join two corners first then, after the adhesive has set, join the two halves of the frame together.
Corner slmaps are a favourite among seasoned woodworkers
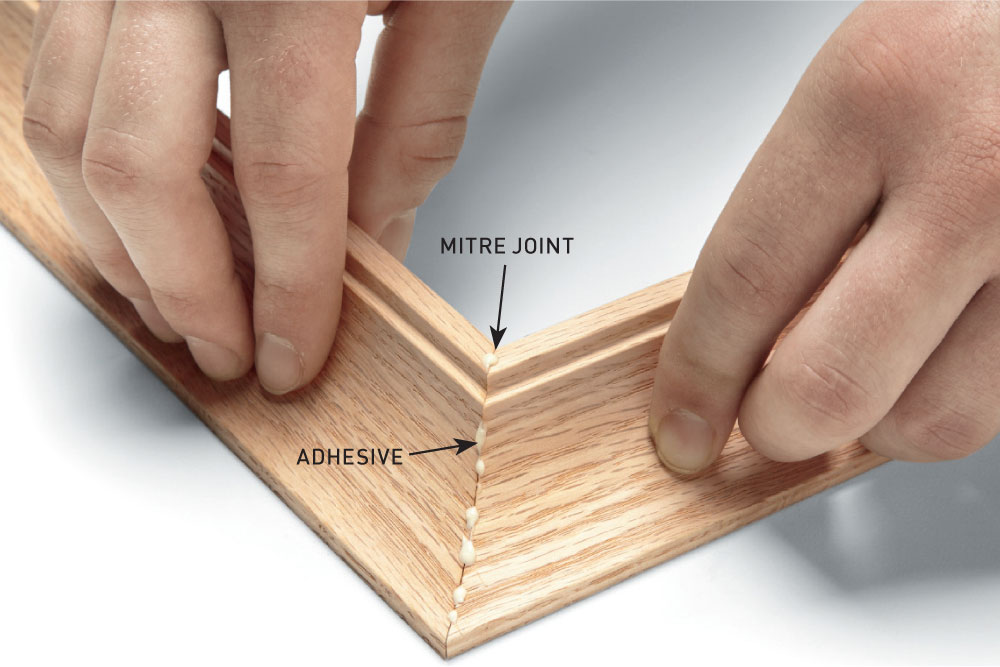
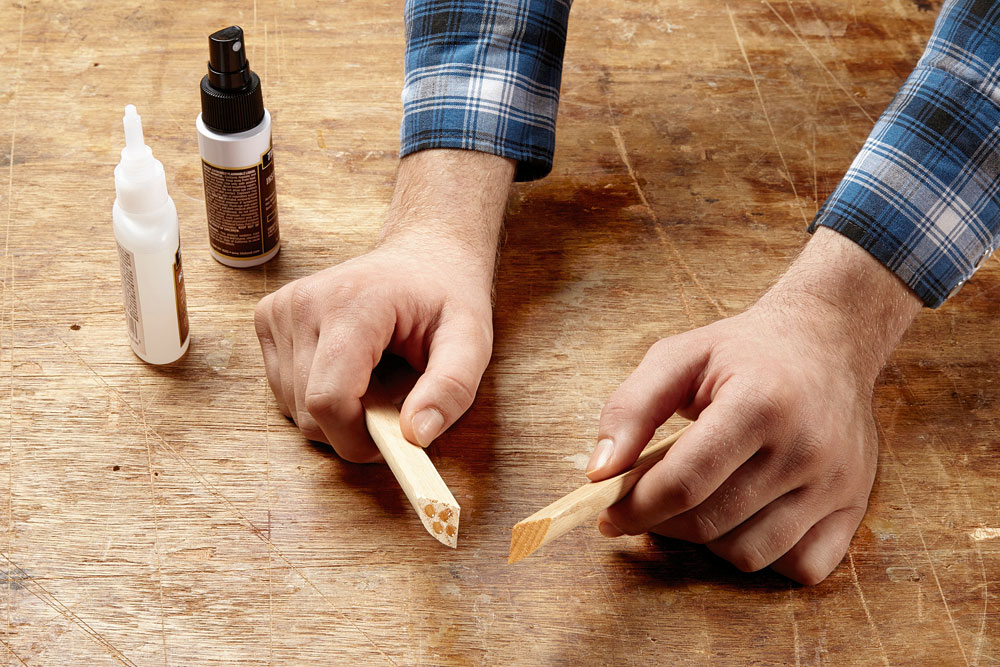
Bond joints instantly
Trim carpenters have used this little cheat for years. To make working with small pieces of timber less fiddly, apply a few dabs of cyanoacrylate adhesive, otherwise known as superglue, to both surfaces.
Immediately press the parts together and they’ll bond in seconds. No waiting and no complicated clamping setup.
This is ideal for use on smaller jobs, such as joining sections of trim moulding.
To make working with small pieces of timber less fiddly apply a few dabs of superglue to both surfaces
Close unsightly gaps
You can close a gap in the outside of a mitre by rubbing it with the shank of a screwdriver or any hard, smooth tool, such as the end of a utility knife.
This will crush the timber fibres inwards to make the gap disappear. Even professional carpenters sometimes resort to this trick.
Adjust with paper shims
If you’ve ever tried to adjust the angle of your mitre saw by 0.1° or less to get a perfect joint, you already know how hard micro-adjustments are.
An easier way is to slap a few Post-it notes on the fence, make test cuts and add or remove sheets until you get exactly the angle you want.
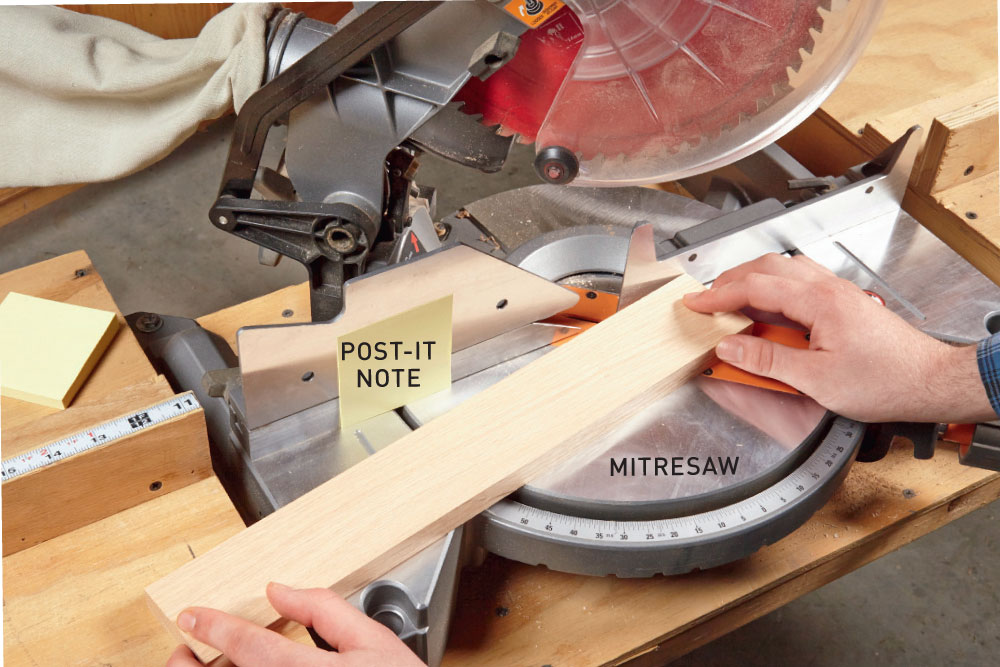
An easier way to adjust the angle of your mitre saw is to slap a few Post-it notes on the fence
Feel the difference
When you’re building a box or frame, the opposite sides have to be exactly the same length. To make sure they are, do the touch test.
Set the parts side by side and run your finger over the mitred ends. You may not be able to see a slight length difference, but you’ll feel it.
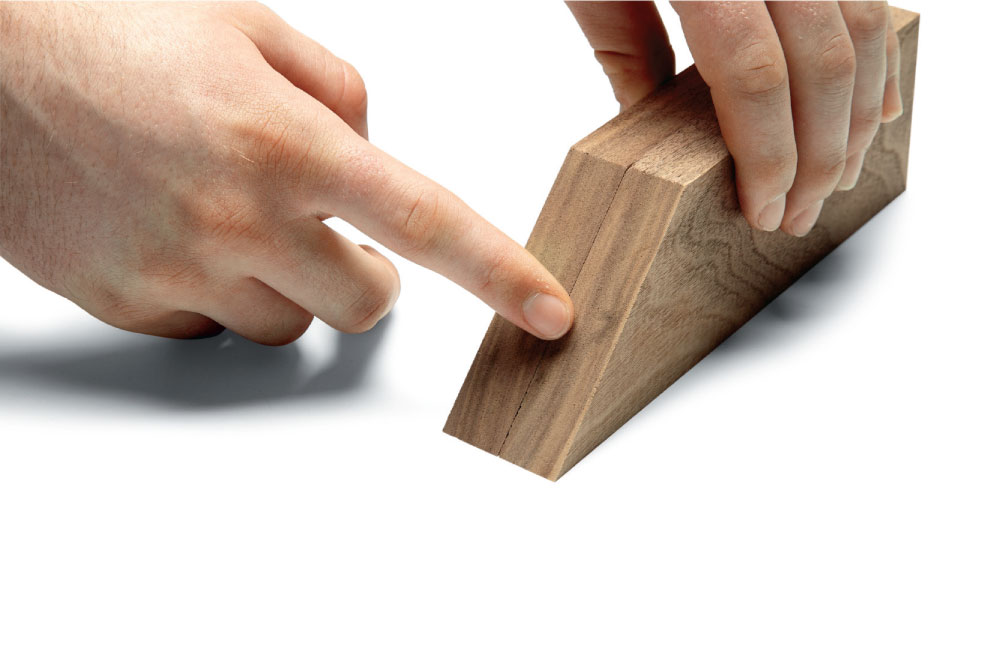
When you’re building a box or frame the opposite sides have to be exactly the same length, to make sure they are, do the touch test