Build Adirondack Chairs

Enjoy your favourite spot in the sun with a classic style of garden seating that has stood the test of time.
Settle into one of these timber chairs and you’ll appreciate why the iconic design, first seen in 1903, is still such a popular choice for garden and patio seating.
Developed by Thomas Lee while on holiday in the Adirondack Mountains, northeastern USA, the chair became an instant hit with locals and its fame spread rapidly.
This chair and love seat combo is ideal for outdoor lounging. Make them in a weekend for just over $200, and you’ll have classic furniture that will be enjoyed for many seasons to come.
We used radiata pine because the chairs were not going to be exposed to the elements. It’s inexpensive, easy to work with, and takes paint beautifully.
If your chairs will be left outside, use Tasmanian oak, blackbutt, maple, Western red cedar or treated pine.
TIP Seal all cut surfaces before assembly to ensure longevity. Attach furniture glides to the underside of the legs.
Finish the timber
Once the chairs are assembled, round over all the edges with 180 grit abrasive paper, paying particular attention to the legs and arms.
Protect the timber by applying a stain, varnish stain, or exterior paint in the colour of your choice. We used two coats of Feast Watson Outdoor Furniture Oil in Teak.
Fasteners
Use 30mm x 8g exterior timber screws to secure the arm bases and seat support to the legs, and the back braces to the back slats. Use 40mm x 8g galvanised screws for everything else, applying construction adhesive to all joints.
Choosing a chair back style
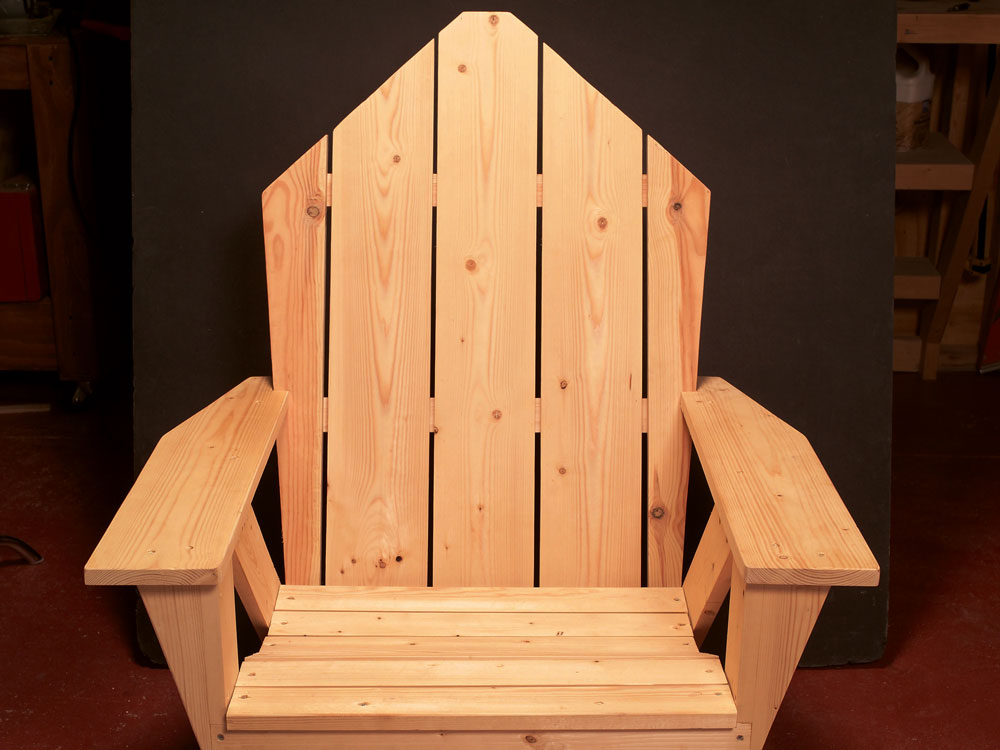
The slatted Adirondack design is well suited to a range of different back styles. If the step-back version doesn’t appeal, the gable or round shape may be more to your taste.
For the gable back mark a line 40mm from the top centre to 180mm down the side of each outer slat.
Create the round-back style by marking a centrepoint 380mm down from the top then drawing an arc with a 355mm radius.
Before committing to a shape, sketch your idea on paper and tape it to the chair to see how it will look at full size.
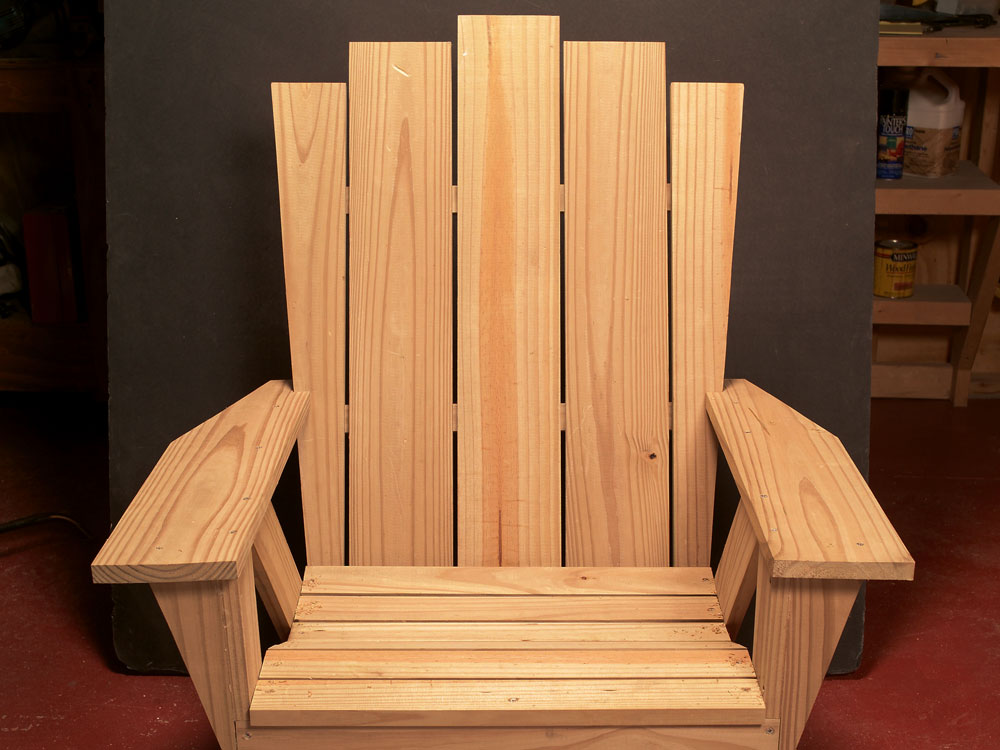
Step back Adirondack chairs are highly popular
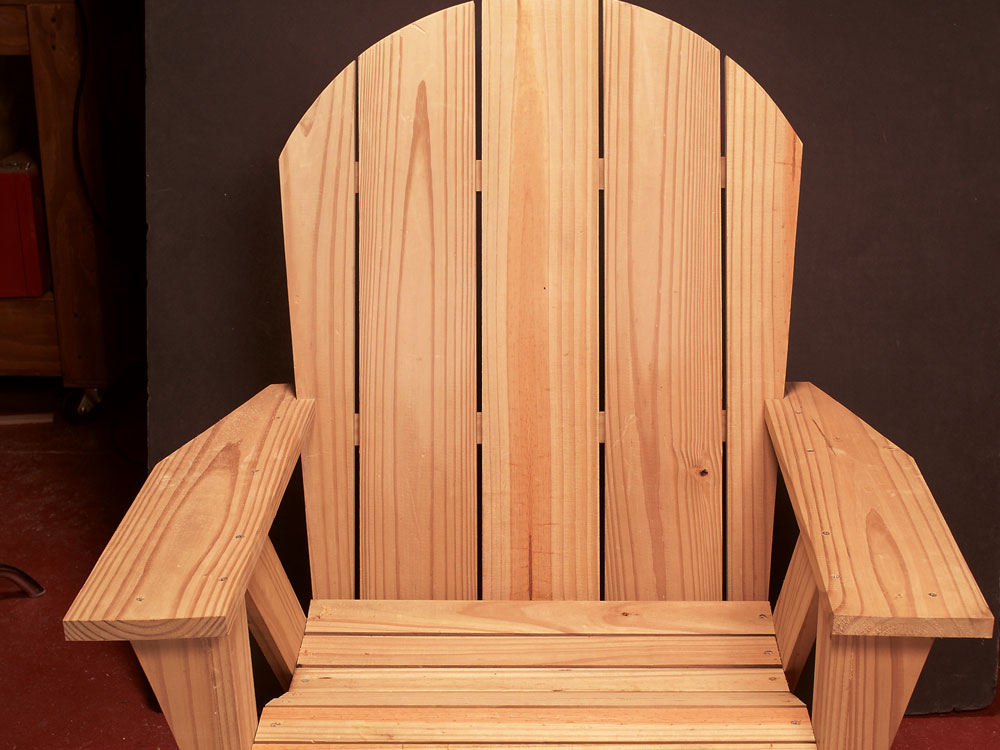
Create the round-back style by marking a centrepoint 380mm down from the top then drawing an arc with a 355mm radius
Love seat diagram and cutting list
The love seat is made in the same way as the chair, except with a wider back and extra seat support in the centre. The wider back necessitates longer braces and seat slats, plus additional back slats.
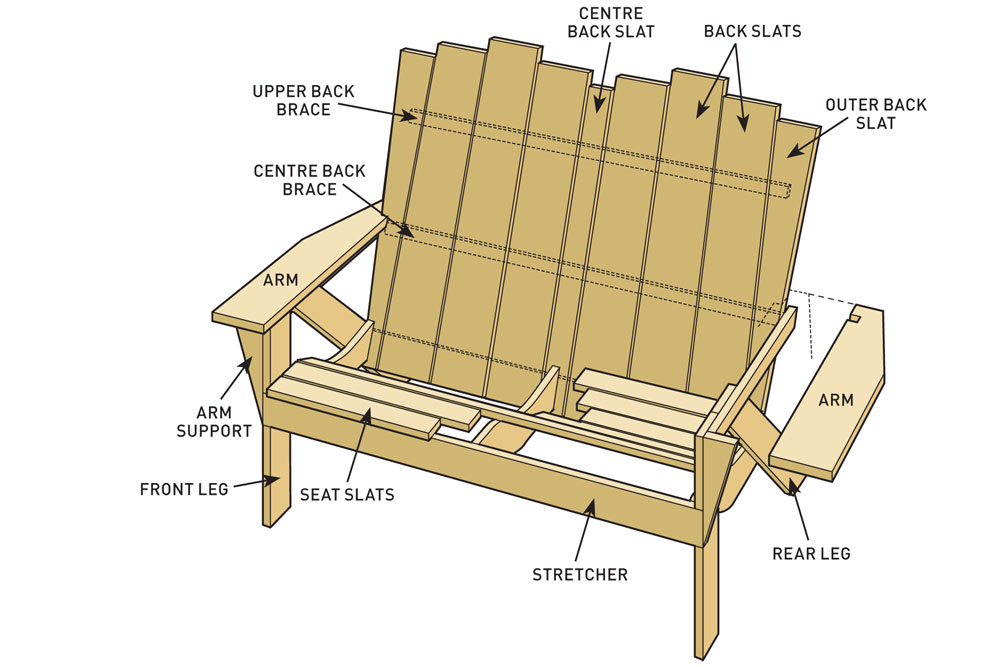
Use this diagram to build an Adirondack love seat
Use this cutting list to build an Adirondack love seat
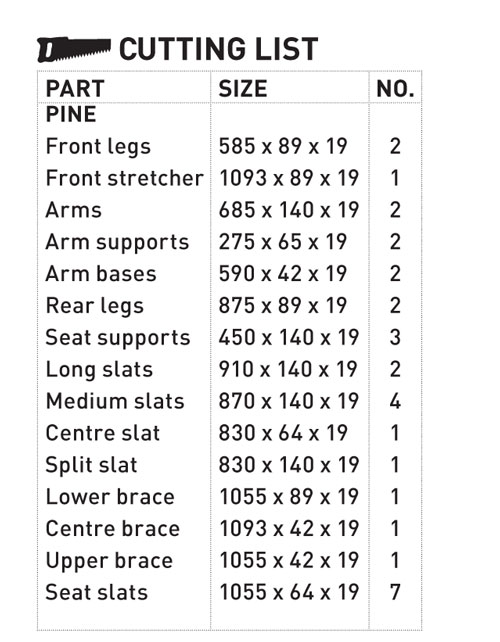
Diagrams
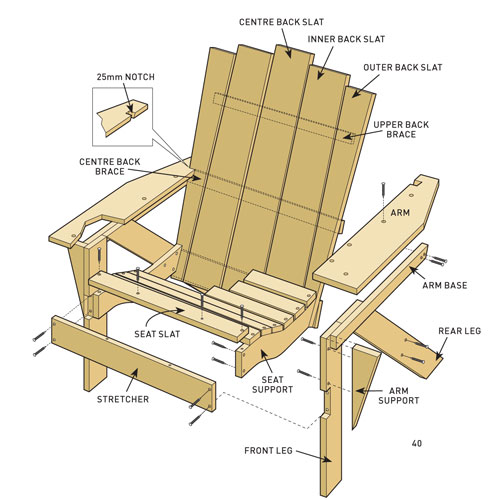
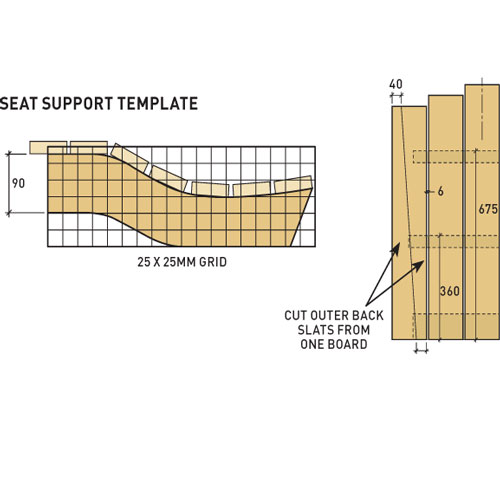
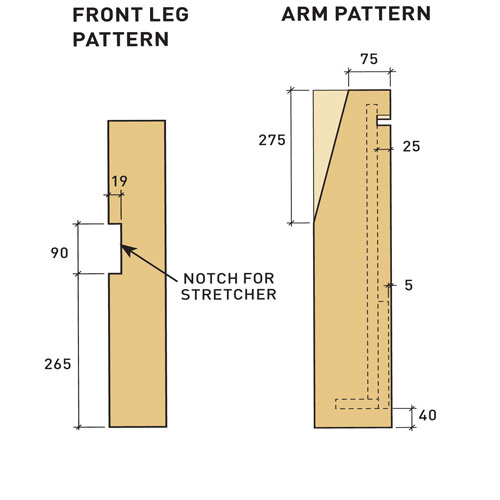
How to build an Adirondack chair


