Build A Bamboo Planter With A Trellis

Grow climbers over a custom-made lattice of bamboo attached to a timber box and use it as a leafy screen.
Add shade or privacy to a deck by building a bamboo trellis designed for climbers. It’s attached to a box made of treated pine frames clad with bamboo slats.
Drill drainage holes in the base of a plastic tub, line it with weedmat and gravel, add quality potting mix then position it in the planter box. attach the trellis
Lay bamboo poles diagonally on a temporary frame to make a lattice, tying them together with wire.
Trim the lattice panel to size and mount it on a bamboo frame then secure it inside the planter box.
Secure treated pine screws through the trellis posts into the upper back rails of the planter box, about 30mm below the capping.
At the base of the trellis posts, position spacer blocks made from offcuts of treated pine, checking for plumb and adjusting the thickness of the blocks to suit, then secure the base of the posts.
TIP Bamboo isn’t a consistent diameter along its length, so start with 15mm thick spacers and gradually sand them down until the posts are plumb.
Fasteners
To build the box and secure the lattice to the rungs, use exterior PVA adhesive and 35mm x 8g treated pine screws.
Add the base cleats to the inside of the front and back rails of the box with 60mm x 8g screws.
Use 30mm x 6g countersunk screws to attach the lattice to the temporary frame and use wire reinforcing ties to bind the poles.
Secure the top rail to the posts and attach the trellis to the inside of the planter box with 60mm x 8g screws.
Build the planter box
Use a mitresaw to cut the planter box components, clamping a stop block 300mm from the edge of the blade to save time when cutting the slats.
TIP Apply masking tape to the frames before cladding to protect the bamboo if staining the pine.
Step 1. Make the frames
Make the frames by securing the uprights between the rails with adhesive. Make a curved profile on the outside inner edges using a router with a 6mm roundover bit.
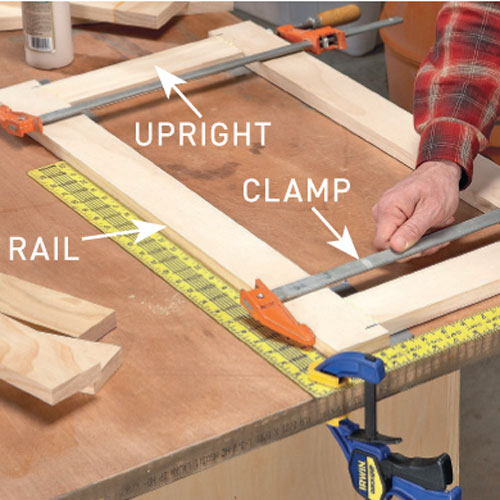
Make the frames by securing the uprights between the rails with adhesive
Step 2. Clad the frames
Clad the frames by first securing the base cleats to the front and back frames then secure the first slat with screws, applying beads of construction adhesive to attach the remaining slats.
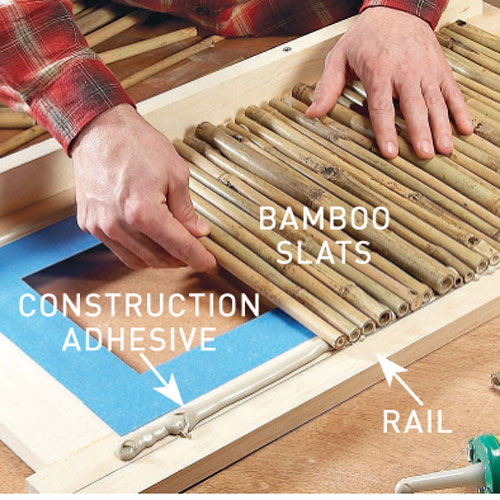
Clad the frames by first securing the base cleats to the front and back frames
Step 3. Finish the box
Finish the box by using screws and adhesive to join the frames, attach the legs and leg sides flush, secure the baseboards to the cleats, and add the capping.
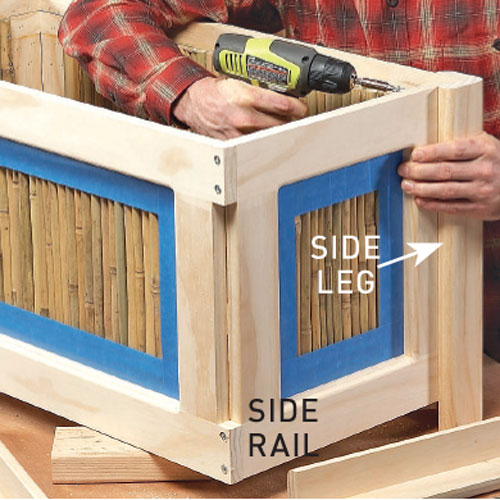
Finish the box by using screws and adhesive to join the frames
Make the trellis


