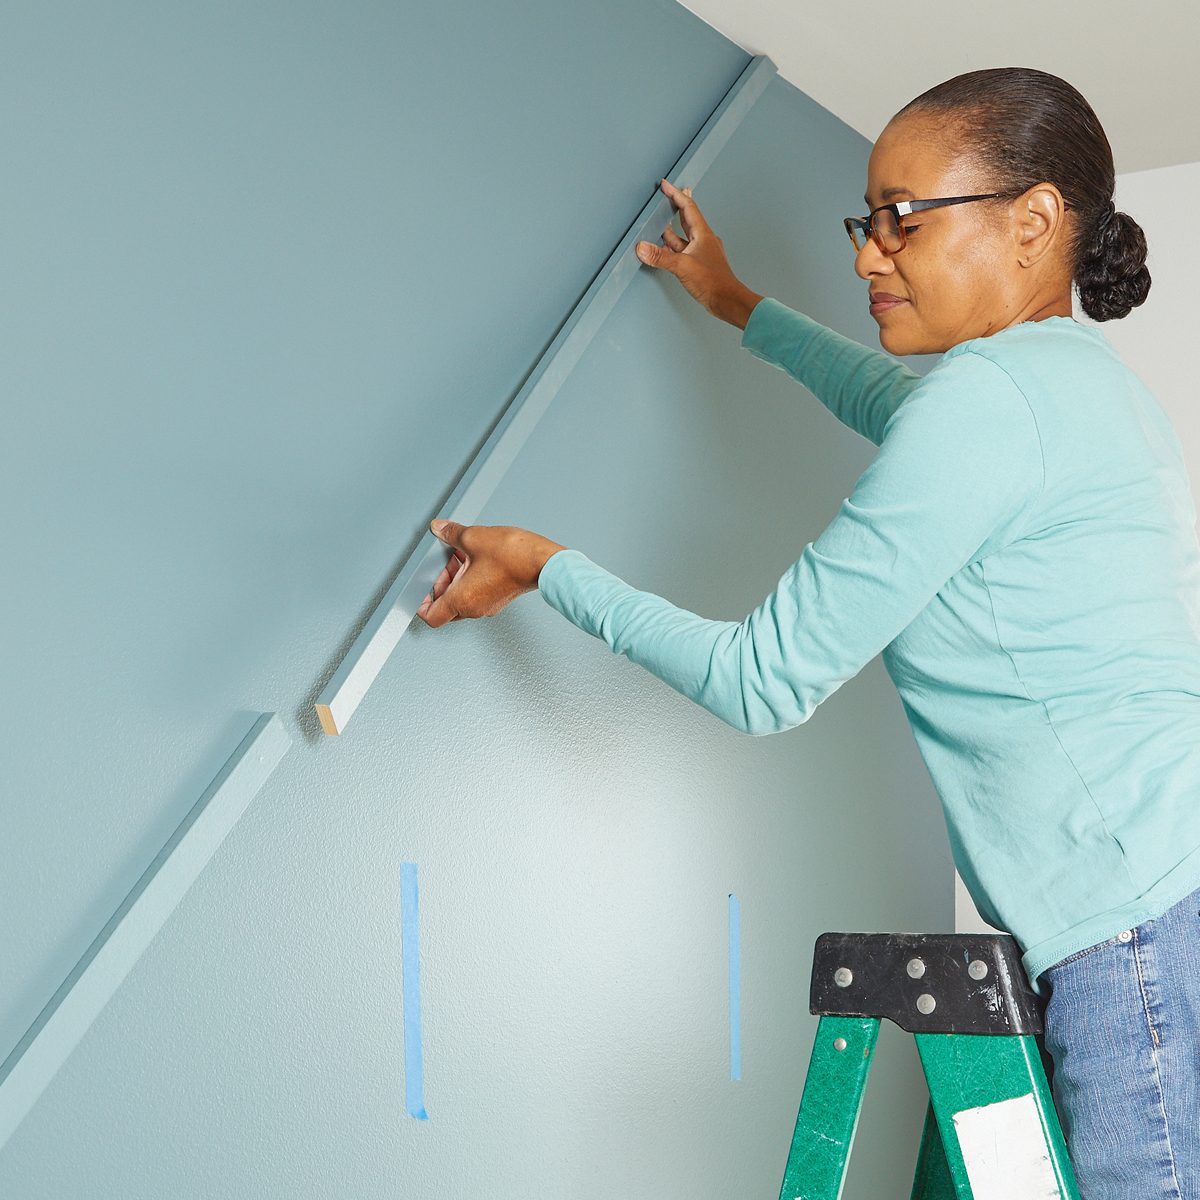
Press the first strip into place
Line up the strip with the laser line, and then press it against the wall. Since this first one is so long, tacking it on with a brad nail every 600mm will help keep it straight.
Advertisement
Add the second strip
The first line in our design requires two pieces, butt jointed together. Make the 45-degree cut on the second piece, hold it in place and then mark the butt joint. Cut the strip to length and glue it to the wall.
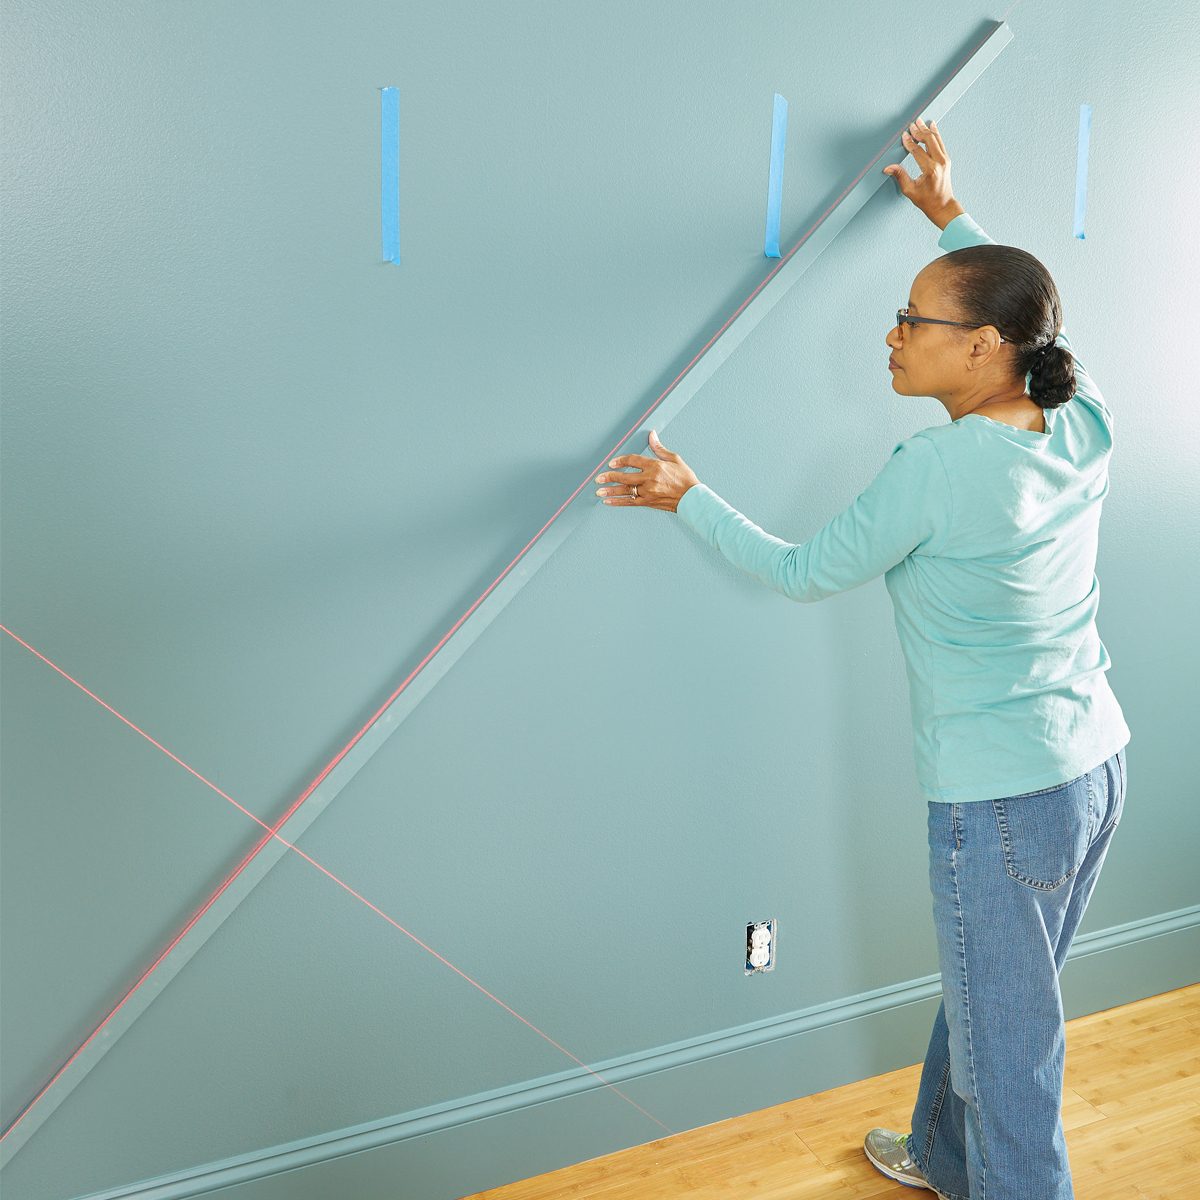
Outline the big shapes
Continue marking, cutting and attaching strips to outline the large shapes, as you did for the first piece. Use the laser level and adhesive, nailing where needed.