DIY Basics: Essential Guide To Soldering

Soldering tools are as varied as the applications of this technique. Similar to welding, it involves melting a filler alloy to join metal objects, but much lower temperatures are used.
This means that only the filler, called solder, melts into the joint, so the workpieces can subsequently be separated.
Suitable for applications ranging from plumbing to electronics and even artwork, soldering irons and blowtorches are available in a wide variety of designs and power outputs, and compatible with a number of accessories.
Solder on
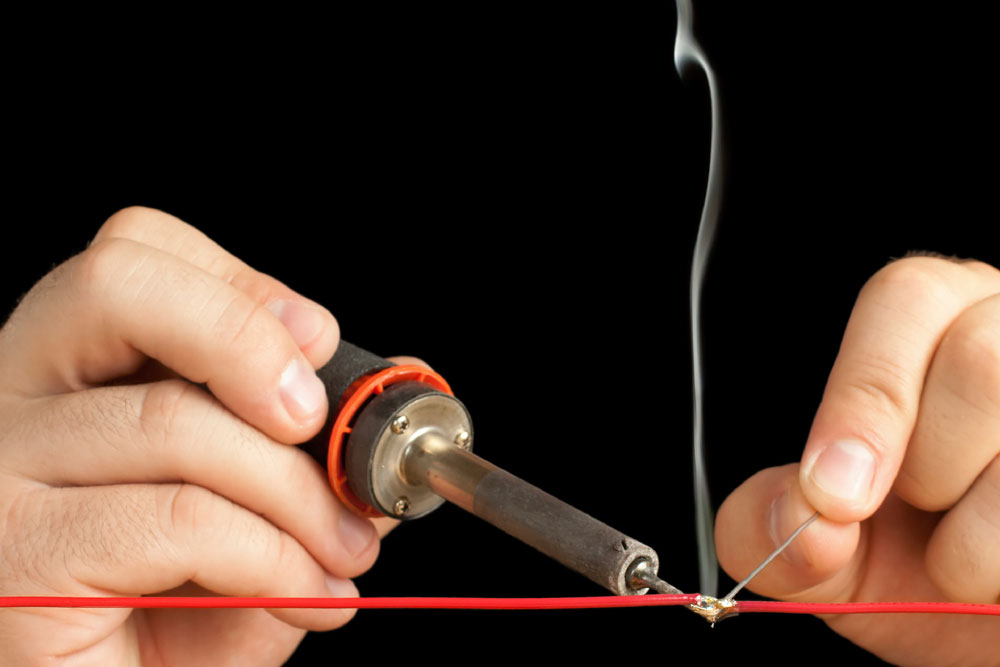
Soldering involves joining metal objects by making them hotter than the melting point of a filler alloy.
The alloy, called solder, is then applied to the metal, where it melts and is drawn in between them.
Traditional solder comprises 63% lead and 37% tin, and melts at exactly 183ºC. A different alloy that melts at a higher temperature and does not contain lead is used for soldering water pipes.
Brazing is essentially the same process as soldering, except using filler made from metals with higher melting points, like silver or brass.
It is commonly used for industrial tasks such as radiator repair.
At the DIY end of the spectrum, brazing using a silver-based alloy, which melts at or over 450ºC, is a popular technique for creating handmade jewellery. This is often described as hard soldering, as distinct from soft soldering with filler materials that melt at or below 200ºC.
Soft soldering is used for joining copper pipes to valves and connectors in plumbing. Even more frequently, it is used in electronics, ensuring strong and conductive joints between wires, circuit boards and various components.
When soldering electronics DIY, it’s worth investing in a few accessories in addition to a reliable soldering iron.
Use a hobby vice or adjustable clip array to leave your hands free to work, and a desoldering pump to correct any mistakes. A heat sink is also useful for protecting delicate components from damage through overheating.
Types of soldering irons
Modern soldering tools not only offer cordless operation but often also feature variable heat settings.
MAINS POWERED soldering irons are the classic variety that have been around for decades. New developments in this type of tool include the option to switch between high and low power settings.
GAS FUELLED tools tend to offer the most power of all cordless soldering irons. Some have interchangeable tips for soldering, hot-knife cutting and similar jobs, as well as a burner nozzle that allows them to be used as mini blowtorches.
BATTERY POWERED soldering irons offer the cordless convenience of gas-fuelled tools, while running on standard AA batteries. Some offer
a dual-power function for operating at higher or lower temperatures.
LI-ION RECHARGEABLE cordless soldering irons offer fast heat-up time and a convenient charging dock, plus push-button operation.
Wood burning
Touching the tip of a soldering iron to a timber surface makes small, blackened burn marks that can be used to make patterns, lettering or even intricate artworks.
The technical term for this is pyrography, meaning ‘writing with fire’, but it is also called pokerwork or wood-burning.
With practice, fine shading can be achieved by using different shaped tips and controlling the temperature of the tool.
Wood-burning kits available from hardware stores include a specialised soldering iron that is designed to stay hot for long periods, plus several tips that create different patterns.
Soldering techniques
Soldering electronics is a reasonably simple process, but some butane fuelled tools need to be started in a specific way, and if you make a mistake or need to replace a component, it’s worth knowing how to use a desoldering pump.
How to light a gas soldering iron
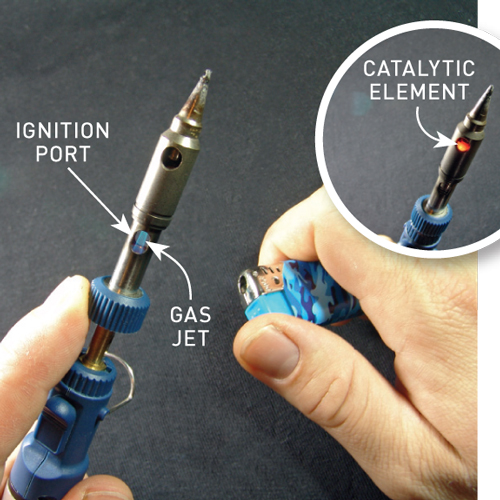
Slide the springloaded sleeve up to expose the gas jet, start the flow of gas then light it through the ignition port. Let the element warm up for a few seconds then release the sleeve so it springs back into position.

Slide the springloaded sleeve up to expose the gas jet, start the flow of gas then light it through the ignition port
How to solder a component
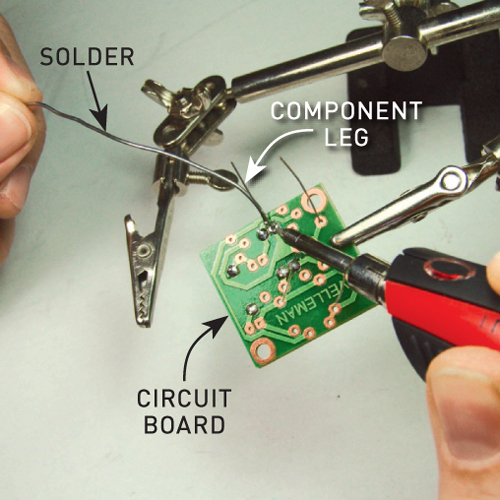
Push the legs of the component into the terminal holes in the circuit board, angling them slightly to lock them. Warm up the soldering iron and touch the tip to the terminal, then feed the solder into the opposite side of the joint.

Push the legs of the component into the terminal holes in the circuit board, angling them slightly to lock them
How to use a desoldering pump
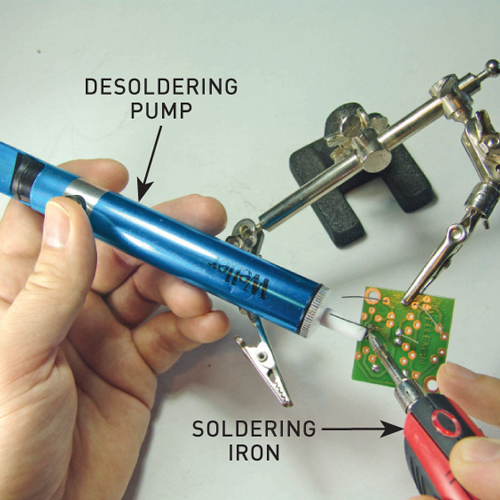
Warm up the soldering iron and press the tip directly to the solder. Arm the pump by pressing the springloaded plunger, and when the solder is fluid, trigger the pump to suck the solder out of the joint.

Warm up the soldering iron and press the tip directly to the solder
How to solder a copper pipe


