DIY Classic Workbench
No DIY space is complete without a sturdy and stable workbench, and if this one looks familiar, it’s probably because it’s a classic design.
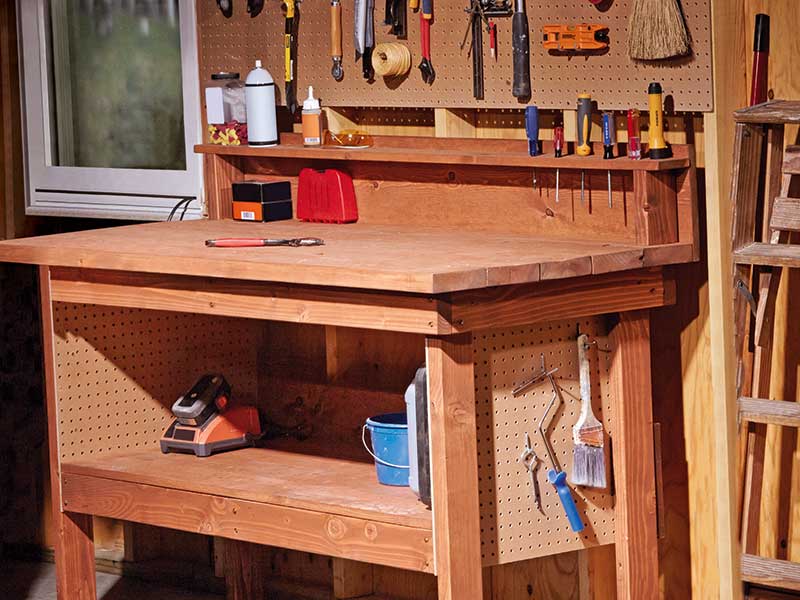
It’s has been around for decades, and for good reason. The bench is durable, practical, spacious and also super easy to build.
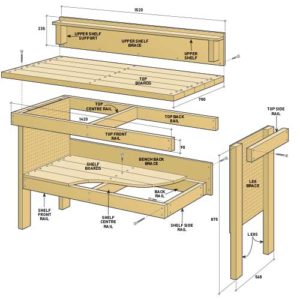
This 1500 x 600mm workbench includes pegboard side panels for hanging tools, storage space on upper and lower shelves, and enough room below the worktop to add drawers if you want to customise it further.
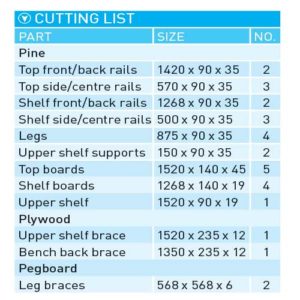
Construct the framework from 90 x 35mm non-structural pine and brace the table and upper shelf using 12mm CD plywood.
Cut the pine to length using a mitresaw, and the plywood and pegboard using a circular saw and straightedge clamped in position.
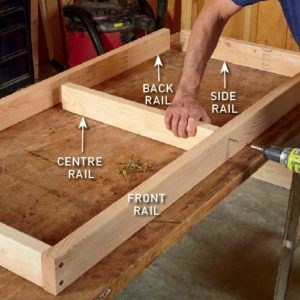
Assemble the bench
Set up a level work surface on a pair of sawhorses and start by building the top and shelf frames, adding only the lower shelf boards at this stage.
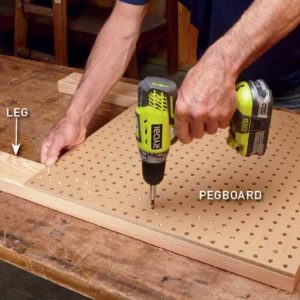
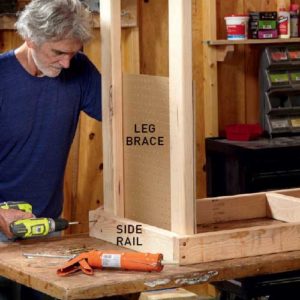
Build and attach the leg assemblies to the top frame and then secure the lower shelf in between.
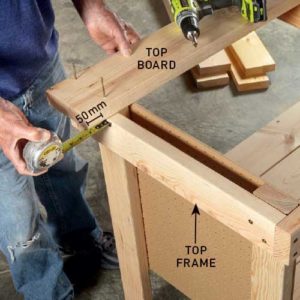
To finish, add the top boards, then construct and fit the upper shelf unit to the back of the benchtop, adding plywood braces to the back of the workbench and upper shelf.
The top boards overhang the frame by 50mm on the sides and front to make clamping easier, and the back brace helps prevent things falling off.
The pegboard is useful for hanging tools, but its real function is to help stabilise the leg assembly as a brace.
Remember, you should keep the leg assemblies 2mm narrower than the inside of the top so you can install the legs without binding, which would cause the pegboard to bow.
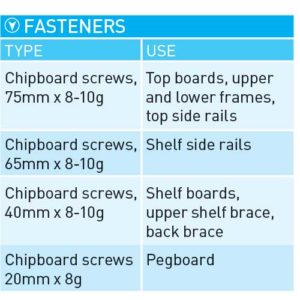
We added construction adhesive to keep the assemblies strong and rigid. And to make frame assembly easier, drill 2mm countersunk pilot holes for all the screws.
TIP If you plan to stain or paint the bench, do this before assembly.