Growing Clivias
These landscape lovelies colour up a shady corner and can be divided after spring flowering for lots more plants.
Whether you grow them in beds or pots, clivias are among the most versatile, hardy and beautiful plants you can include in your landscape.
Given the right position they’ll reward you with luxuriant foliage and blooms with a minimum of care.
The standard colour is salmon but they also come in near white, buttery yellow and flame orange. Leaves are emerald green, varying from long and narrow to very broad.
Clivia miniata, the most often seen species, flowers in late winter but C. nobilisand C. caulescenscan bloom a couple of times a year.
TIP Variegated forms are available but are costly and often unstable, reverting to plain green as the plant matures.
A good provider
Clivias are showy but surprisingly low maintenance and are easy to grow from seed or propagate by division.
Over time clivias naturally form an ever-expanding clump in beds, while in pots they can become too crowded to perform well.
After spring flowering, a large garden clump or root-bound container plant can be divided for lots more clivias that can be potted up.
Most clivias set a large number of seeds every year. These take a year to ripen so it’s not unusual to see a plant flowering while holding a ripe seed-head from the previous season.
Selective breeding
Also called kaffir lily, all clivia species originally hail from South Africa and have been much sought after since their discovery by Europeans in about 1815.
They were named for Lady Charlotte Clive, Duchess of Northumberland, who first cultivated them in the UK.
Today the most desirable hybrids come from China, after decades of extensive breeding.
Certain top quality variegated forms can sell for thousands of dollars.
Dividing a clump
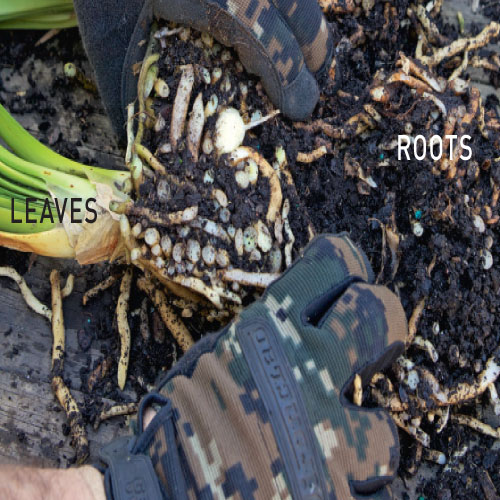
To lift a plant from the garden, drive in a spade from the edge at 45°, working your way around until the entire clump comes loose then remove most of the soil from the roots. TIP You may need to break the pot to free a crowded plant.
Step 1. Cut the roots
100mm of rhizome and a leaf set. Remove any soil and damaged roots. Trim the leaves by a third and put in a cool, dry spot until the cuts seal.

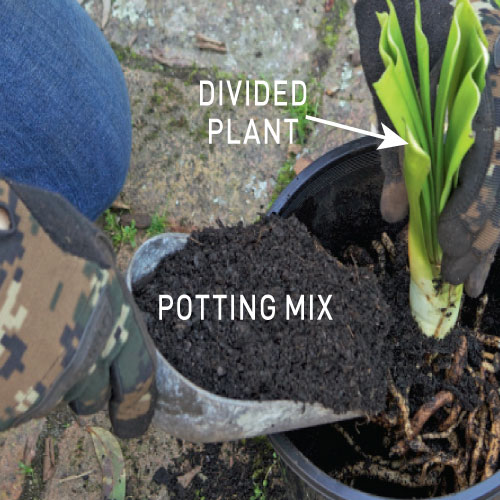
Step 2. Add each plant
Add each plant to a pot part-filled with potting mix, hold it upright and backfill around the roots and rhizome, firming the mix down. TIP Use the same method in beds.

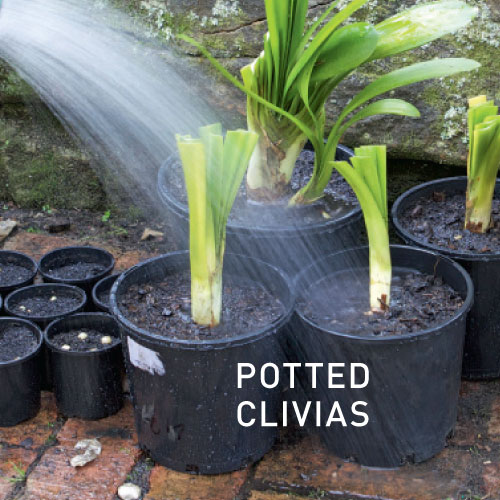
Step 3. Position the pots
Position the pots in a shady spot and water in the plants well. Don’t keep clivias too moist while they establish, as this can lead to fungal problems and rot.

How to grow
The roots and leaves of clivias grow from a fleshy rhizome that branches out, creating offsets or pups that in turn shoot new leaves.
Clivias need free-draining soil and don’t like frost but tolerate heavy shade. In cold climates they are often grown as indoor plants.
POSITION in a warm, shady spot with protection from afternoon sun. The dappled light under trees is ideal.
WATER regularly in spring and summer but let them dry out in autumn and winter. Clivias are quite drought-tolerant but won’t survive wet feet, so don’t use pot saucers.
FEED in spring after flowering with an all-purpose fertiliser and give them regular applications of seaweed tonic.
PROPAGATE by division or grow from seed after flowering. Divided plants usually flower in two years while seed-grown plants take four to six.
TIP Wear gloves to handle clivias, as they contain low levels of alkaloids that irritate skin.
Growing from seed
Spring is when clivia seeds are ripe and ready. Sow them in pots and the first leaves should be visible in a month or two. The seeds have a high viability rate so you may be able to grow 20 or more plants a year from a single plant.


