Install A Timber Window Frame

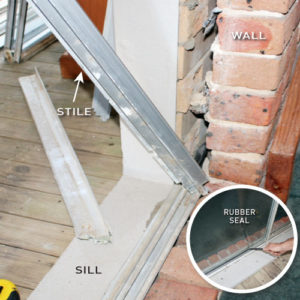
This aluminium window set in double brickwork had corroded over time with exposure to salty air. The surface was pitted and eaten away in parts and the double hung sash was no longer functional.
As part of a new look, the old 1800 x 2000mm floor-to-ceiling combination window was replaced with a smaller 1800 x 1200mm high wind-out awning timber window.
An 800mm gap below the window was filled with two 1800 x 800mm stud frames built from 90 x 45mm T2 Blue pine to guard against termites.
Blueboard was used to clad the outside of the new stud wall.
Insulation was fitted into the cavity and plasterboard attached using stud adhesive and clouts.
The new timber, blueboard and plasterboard were sealed and finished to protect them from the weather and blend in with the existing decor.
All the frames were sanded using 240 grit paper and stained in Sikkens HLS Light Oak, then finished with two coats of Sikkens Supernatural Top Coat.
Two coats of Dulux Weathershield were applied to the blueboard.
The new plasterboard was sealed before undercoating and painting with two coats of acrylic wall paint.
Build A Stud Wall
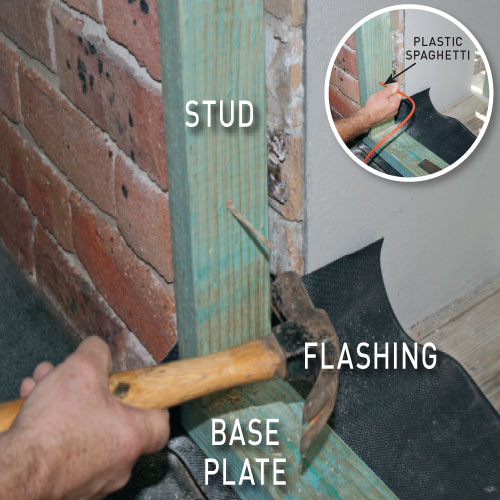
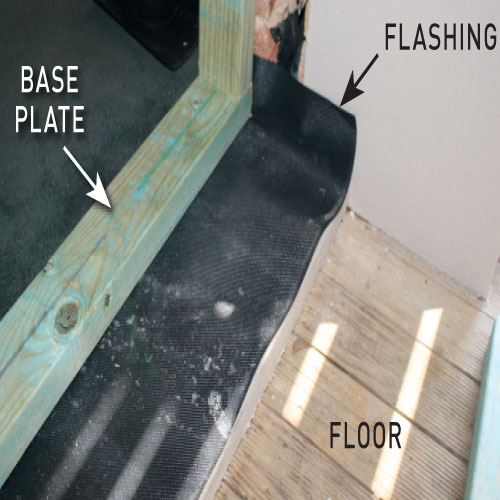
To replace a full-length window with a smaller one, build a stud wall to close the space in between the floor or wall and the base of the frame, using 300mm wide flashing to seal the gap.
Step 1. Measure the opening
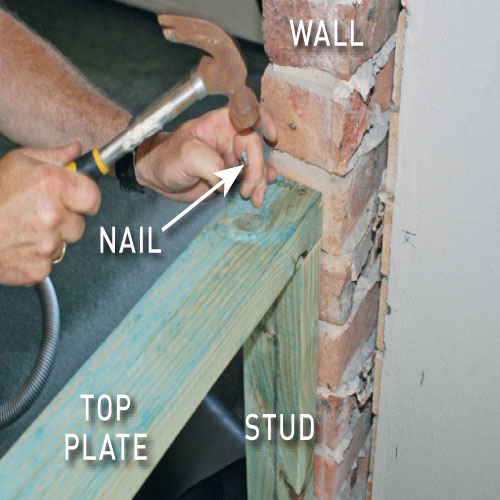
Measure the opening and cut the top plates, base plates and studs to length. Assemble an outside and inside frame, securing each joint with a pair of nails.
Step 2. Cut the flashing
Cut the flashing to length from the roll, turning up 100mm at the ends. Position it across the cavity leaving enough to turn up at the back of the stud wall before the plasterboard is installed.
Step 3. Position the frames
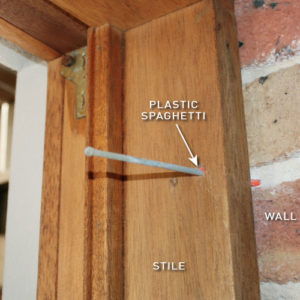
Position the frames and drill two 5mm holes 100mm from the top and base through the studs into the brick joints. Push plastic spaghetti into the holes and secure with nails.
Install A Timber Window Frame